
Gain Comprehensive Insights on Travertine and Its Protective Sealers
Discover Why Travertine is the Perfect Natural Stone for Your Home
Travertine is a remarkable natural stone formed from mineral deposits that arise from hot springs. Celebrated for its distinctive porous texture and an impressive array of earth-toned colours, travertine stands out as an exceptional choice for both flooring and wall cladding in numerous residential and commercial properties throughout Australia. Its aesthetic appeal coupled with its durability makes travertine an ideal option for various indoor and outdoor settings, infusing elegance and a touch of luxury into any space. When properly maintained, travertine can significantly enhance the overall atmosphere of your home.
Travertine can be found in many iconic structures and modern residences across Australia. From the stunning Roman baths in Bath to the charming rustic pathways of countryside cottages, travertine brings a sense of enduring beauty that resonates deeply with homeowners. However, without proper maintenance, the initial allure of travertine may fade over time. This underscores the vital role of sealants in preserving its natural elegance and ensuring it continues to impress for years.
A sealer acts as a protective barrier against stains, spills, and moisture, safeguarding the inherent beauty of travertine. Over time, these sealers can deteriorate, necessitating their removal to maintain the stone’s pristine appearance. Knowing the safest method to strip old sealers off travertine is crucial for keeping surfaces looking immaculate and showcasing the stone’s natural beauty without unsightly signs of wear or damage.
Expert Recommendations: Top Products for Daily Care of Travertine

Fila Pro Floor Cleaner
|
Lithofin Easy Care
|
Vileda H2PrO Spin Mop System
|
Understanding the Various Types of Sealers Used on Travertine
Sealers are vital in protecting travertine surfaces by serving as a defensive layer against stains and moisture. Primarily, there are two main types of sealers suitable for travertine: penetrating sealers and topical sealers. Each offers distinct advantages and applications that cater to different needs.
Pentrating sealers are specially designed to penetrate the stone’s pores, creating a barrier that resists liquid penetration while preserving the stone’s natural appearance and texture. This type of sealer is particularly effective for outdoor applications, allowing the stone to breathe while providing protection against water and harmful substances. Given Australia’s unpredictable weather conditions, penetrating sealers are especially suitable for safeguarding against rain and humidity.
On the other hand, topical sealers form a protective coating on the stone’s surface. These sealers can offer a glossy finish that enhances the beauty of travertine, making them a popular choice for indoor spaces. However, topical sealers tend to wear off more quickly and usually require more frequent reapplications, especially in high-traffic areas. A thorough understanding of the various types of sealers enables homeowners to make informed decisions regarding their travertine flooring or surfaces.
Why Removing Old Sealers is Crucial for Effective Maintenance
Removing outdated sealers is an essential aspect of travertine maintenance that should not be overlooked. Over time, sealers can deteriorate, leading to dullness, discolouration, and an overall unattractive appearance. The build-up of dirt, grime, and other contaminants can worsen the problems caused by a failing sealer, resulting in a tired and worn-out aesthetic.
Moreover, neglecting to remove old sealers can trap moisture beneath the surface, creating conditions favourable for the growth of mould and mildew. This not only poses health risks but can also lead to costly repairs. By knowing the safest way to strip old sealers off travertine, homeowners can effectively rejuvenate their surfaces, restoring their natural beauty and prolonging the life of the stone.
Consistent maintenance, including the removal of aged sealers, is crucial to prevent the build-up of contaminants and ensure that the travertine remains visually appealing and structurally sound. With appropriate care, travertine can continue to be a stunning feature in any home, showcasing the elegance of classic architecture.
Critical Safety Measures for Sealer Removal Projects

Why Protective Gear is Essential During Sealer Removal
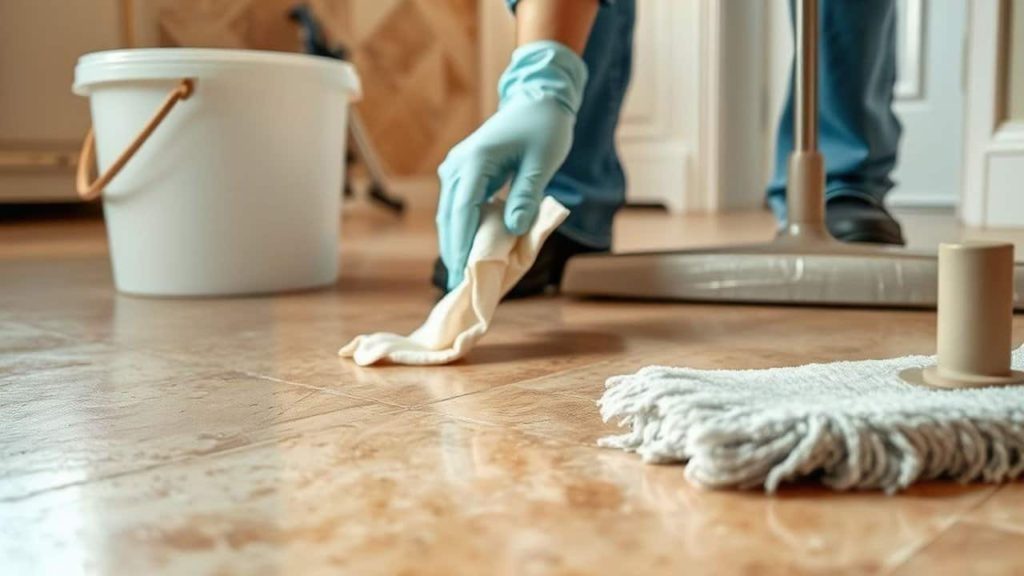
When undertaking the task of stripping old sealers from travertine, prioritising safety is of utmost importance. The chemicals contained in sealer removers can pose significant risks, making it essential to wear appropriate protective gear. Start by donning gloves to protect your skin from potential chemical burns or irritations that may arise during the process.
Goggles are equally vital, particularly when handling liquids that may splash during application or removal. Safeguarding your eyes from harsh chemicals is crucial, as accidental exposure can lead to severe irritation or injury. Additionally, wearing a mask is recommended to prevent inhaling harmful fumes, especially in poorly ventilated areas. Being well-equipped not only safeguards your health but also provides peace of mind throughout the task.
It’s wise to wear old clothing or an apron, as chemicals can stain fabrics. This precaution allows you to work comfortably without worrying about damaging your attire. Implementing these safety measures will enhance both your protection and efficiency during the sealer removal process.
How to Ensure Proper Ventilation During the Sealer Removal Process
Proper ventilation is a critical safety aspect when removing old sealers from travertine. Many chemical removers emit vapours that can be harmful if inhaled. Therefore, working in a well-ventilated area is essential to reduce the concentration of these fumes in your environment.
Open windows and doors to create a cross-breeze that promotes fresh air circulation while using the chemicals. If possible, use fans to improve airflow, helping to disperse fumes from your workspace. In scenarios where outdoor ventilation isn’t practical, consider using an air purifier equipped with a HEPA filter to capture harmful particles and enhance air quality.
Furthermore, taking regular breaks to step outside for fresh air can help minimise exposure to lingering vapours. Maintaining good ventilation not only promotes safety but also enhances the overall effectiveness of the stripping process, ensuring that the chemicals work as intended without interference from vapour accumulation.
Best Practices for Safely Handling Chemicals During the Sealer Removal

Safe handling of chemicals is paramount when stripping old sealers from travertine. Always consult the manufacturer’s instructions and safety data sheets for the products you plan to use. These documents provide vital information regarding safe handling, potential hazards, and proper disposal methods.
When applying the sealer remover, use a designated container and tools compatible with the chemicals to prevent adverse reactions with incompatible materials. Ensure that your workspace is clear of any flammable items and that children or pets are kept at a safe distance.
Moreover, it’s essential to adhere to local regulations concerning the disposal of chemical products. Many regions have specific guidelines for discarding hazardous materials, which may require taking them to a designated waste facility. By following safe practices and responsibly handling chemicals, you can protect both yourself and the environment while effectively removing old sealers.
Selecting the Most Effective Sealer Remover for Travertine
Understanding the Different Types of Sealer Removers Available
Choosing the right sealer remover is a pivotal step in the process of stripping old sealers from travertine. There are two primary categories of sealer removers: solvent-based and water-based. Each type presents unique benefits and considerations, shaped by the nature of the sealant previously applied.
Solvent-based removers are generally more potent and effective at breaking down heavy-duty sealers. They are particularly beneficial for penetrating sealers, which may resist removal. However, these products can produce strong fumes and pose health risks if not handled with care. Therefore, ensuring proper ventilation and wearing suitable protective gear is crucial when working with these solutions.
Conversely, water-based removers are typically milder and less toxic, making them a safer option for indoor applications. They effectively eliminate topical sealers that may have formed a thick coating over time. While they may take longer to work compared to solvent-based products, their ease of use and reduced environmental impact make them appealing to homeowners seeking a safer alternative.
Recognising the specific type of sealer applied to your travertine will assist in selecting the most effective remover, ensuring a successful stripping process without risking damage to the stone.
Assessing the Environmental Impact of Sealer Removers
In today’s environmentally-conscious society, opting for eco-friendly sealer removers is beneficial for both personal health and the planet. Many traditional solvents contain harsh chemicals that can harm aquatic ecosystems and contribute to air pollution. By selecting biodegradable and non-toxic products, you can minimise your ecological footprint while effectively stripping old sealers from your travertine.
Look for sealer removers that are marketed as environmentally safe. These products are designed to break down into less harmful substances, ensuring that any residues left after use do not negatively impact the environment. In Australia, numerous suppliers offer eco-friendly options, giving homeowners confidence that they are protecting both their homes and the planet.
Moreover, using eco-friendly products often results in fewer harmful fumes, creating a safer and more pleasant work environment. By making informed decisions about the chemicals you use, you contribute to a sustainable future while maintaining the beauty of your travertine surfaces.
Verifying Compatibility with Travertine Before Application
Ensuring compatibility between the chosen sealer remover and travertine is vital to avoid damaging this delicate stone. Travertine is porous and can react adversely to harsh chemicals that could result in etching or discolouration. Therefore, it is essential to carefully review product labels and select removers specifically formulated for natural stone surfaces.
Conducting a test on a small, inconspicuous area before full application can provide valuable insight into how the travertine will react. This patch test allows you to determine whether the product causes any discolouration or damage, enabling you to make an informed decision before proceeding with the entire surface.
Additionally, consulting with professionals or reading reviews from other users can provide extra insights into the effectiveness and safety of specific products. By confirming that the remover you select is compatible with travertine, you can confidently proceed with the stripping process, preserving the integrity and beauty of your stone.
Using Effective Techniques for Applying Sealer Remover
Utilising appropriate application techniques is essential for achieving optimal results when stripping old sealers from travertine. Begin by thoroughly cleaning the surface to remove any loose dirt or debris, as this initial step enhances the effectiveness of the sealer remover.
Once the surface is prepared, apply the sealer remover evenly, following the product’s instructions regarding the correct thickness and application method. For best results, use a brush or roller to ensure a uniform layer across the travertine, avoiding puddles that can lead to inconsistent stripping.
Allow the remover to sit for the recommended duration, as this contact time is crucial for effectively breaking down the old sealer. Afterward, use a scrub brush or scraper to carefully lift the softened sealer, taking care not to scratch the travertine surface. Finally, rinse the area thoroughly with clean water to eliminate any residue from the sealer remover, ensuring that the stone is clear and ready for the next steps.
Maintaining patience and attention to detail during the application process will yield significant benefits, helping to restore your travertine to its original allure.
Step-by-Step Guide for Successful Travertine Sealer Stripping
Thoroughly Preparing the Surface for Effective Sealer Removal
Before commencing the sealer removal process, it is critical to properly prepare the travertine surface to ensure optimal results. Start by sweeping or vacuuming the area to eliminate any loose dirt and debris. This initial cleaning step is fundamental, as any remaining particles can hinder the effectiveness of the sealer remover, potentially resulting in uneven application.
Next, cleanse the travertine using warm water mixed with a mild detergent to eliminate any oils or contaminants that may have accumulated over time. Avoid using harsh chemicals that could harm the travertine. After washing, rinse the surface thoroughly with clean water to ensure that no detergent residue remains. Allow the surface to dry completely before applying the sealer remover, as moisture can dilute the effectiveness of the chemicals and obstruct the stripping process.
Once the travertine is dry, inspect the surface for any cracks or damage. Addressing these issues beforehand can prevent complications during the sealer removal process. By dedicating time to proper preparation, you set the stage for a successful stripping procedure, ultimately safeguarding the integrity of your travertine.
Carefully Applying the Sealer Remover with Precision
With the surface adequately prepared, it’s time to apply the sealer remover. Begin by thoroughly reading the manufacturer’s instructions to understand the proper application technique and safety precautions. Using a brush or roller, apply an even coat of the remover across the travertine surface, ensuring that all areas are uniformly covered.
Exercise caution not to apply the remover too thickly, as excessive amounts can lead to pooling, which may damage the stone. Instead, aim for a moderate layer that will effectively penetrate the existing sealer without compromising the travertine beneath.
As you apply, pay close attention to the dwell time recommended by the manufacturer. This waiting period is essential for allowing the remover to penetrate and dissolve the old sealer efficiently. Depending on the specific product, you may need to let it sit for anywhere from 15 minutes to several hours. After this period, check a small area to evaluate the effectiveness of the remover. If the sealer has softened sufficiently, you can proceed to the next step.
Methodically Removing the Old Sealer from Travertine
Once the sealer remover has had adequate time to work, it’s time to lift the old sealer from the travertine. Begin by gently using a scrub brush or a plastic scraper to remove the softened sealer. Avoid metal scrapers, as they can scratch or damage the travertine. Instead, opt for tools specifically designed for delicate surfaces.
As you work, be meticulous in removing all remnants of the old sealer, ensuring that no residues are left behind that could interfere with the re-sealing process later. After extracting as much sealer as possible, rinse the area thoroughly with clean water to wash away any remaining chemicals and debris.
Following this, allow the travertine to dry completely. This step is crucial, as any moisture left on the surface can affect the adhesion of the new sealer that will be applied next. By carefully removing the old sealer and thoroughly cleaning the surface, you effectively prepare your travertine for the next phase of restoration.
Common Mistakes to Avoid During the Sealer Removal Process
Understanding the Risks of Using Inappropriate Products on Travertine
One of the most frequent errors during the sealer removal process is using inappropriate products. Many homeowners may be tempted to resort to harsh chemicals or abrasive cleaners that can inflict irreparable harm to the travertine surface. Such products can cause lasting damage, including etching or discolouration, which may be challenging or even impossible to reverse.
To avoid this issue, it is vital to select a sealer remover specifically formulated for natural stone surfaces. Always read labels and product descriptions to ensure compatibility with travertine. If you’re uncertain, seek advice from professionals or consult suppliers who specialise in stone care for invaluable insights into the safest and most effective products for your travertine.
Moreover, avoid using household cleaners as substitutes for traditional sealer removers. While they may seem harmless, they can contain ingredients that could harm the stone. Being mindful of the products you choose can prevent costly damage and facilitate a successful stripping process.
The Significance of Thorough Rinsing After Sealer Removal
After successfully removing the old sealers, it is imperative to rinse the surface thoroughly. Inadequate rinsing can lead to residue build-up, potentially causing staining or damage to the travertine over time. Even small remnants of sealer remover left behind can negatively affect the performance of any new sealer applied later.
To ensure a comprehensive rinse, use copious amounts of clean water along with a soft cloth or mop to wipe down the surface. Rinsing multiple times may be beneficial to guarantee that all residues have been eliminated. Additionally, inspect the travertine post-rinsing to confirm that no residue remains. Dedicating time to this step will help preserve the beauty and integrity of your travertine.
How to Prioritise Safety Throughout the Stripping Process
Neglecting safety measures during the stripping process can lead to serious consequences. Many homeowners underestimate the dangers associated with the chemicals used in sealer removers, which can result in accidents or health issues. Always prioritise safety by ensuring you wear appropriate protective gear, including gloves, goggles, and masks, as previously discussed.
Furthermore, it is essential to read and comprehend the safety data sheets for all products being used. These documents outline potential hazards and provide guidance for safe handling. Overlooking these precautions not only puts you at risk but can lead to environmental harm. By taking safety seriously, you protect yourself while creating a safer working environment as you effectively restore your travertine surfaces.
Post-Sealer Stripping Care for Travertine Surfaces
Ensuring Complete Drying of the Travertine Surface
After the old sealer has been removed and the travertine rinsed thoroughly, it is vital to allow the surface to dry completely before applying a new sealer. Trapped moisture beneath a new sealer can lead to complications, including improper adhesion and potential damage to the stone.
To facilitate drying, ensure the area is well-ventilated. Open windows or use fans to enhance airflow, allowing moisture to evaporate more quickly. The drying duration for travertine can vary based on the humidity and temperature of the environment; however, it is advisable to wait at least 24 hours to ensure complete dryness.
A thorough check of the surface is also essential before proceeding. The travertine should feel entirely dry to the touch, with no damp patches remaining. Taking this extra time to ensure the surface is arid will significantly improve the efficacy of the new sealer, resulting in a durable and long-lasting finish.
Conducting a Thorough Inspection for Damage After Stripping
Once the surface has dried, it’s time to closely examine the travertine for any damage that may have occurred during the stripping process. Thoroughly check the stone for signs of etching, scratches, or discolouration, as these issues must be addressed before applying a new sealer.
If any damage is identified, consider consulting a professional who specialises in travertine restoration. They can provide recommendations on the best methods for repairing any imperfections. Promptly addressing these issues will help ensure that your travertine not only looks appealing but also remains structurally sound.
Additionally, use this opportunity to assess how well the travertine has cleaned up. If there are still areas that appear discoloured or stained after stripping, it may be worthwhile to invest time in further cleaning or consider a different sealer removal method. A thorough inspection is a critical step that lays the foundation for the successful re-sealing of your travertine.
Applying a New Sealer for Optimal Protection of Travertine
With the old sealer removed and the surface thoroughly inspected, you are now ready to apply a new sealer. Choosing the right sealer is crucial for protecting the travertine while enhancing its natural beauty. Consider the specific requirements of your space—whether it’s in high-moisture areas or high-traffic zones—and select a sealer that meets those needs.
Follow the manufacturer’s application guidelines, ensuring that the surface is applied evenly. Use a brush or roller to cover all areas thoroughly, being careful not to overload the applicator to avoid drips. Depending on the type of sealer chosen, you may need to apply multiple coats to achieve the desired coverage. Ensure adequate drying time between applications, as specified in the product instructions.
After applying the new sealer, allow the travertine ample time to cure before returning it to regular use. This will ensure that the sealer bonds effectively and provides optimal protection against future stains and moisture.
Thoroughly Cleaning Residues Before Sealing
Following the stripping process and prior to applying a new sealer, it’s critical to ensure that any residues remaining from the stripping process are thoroughly cleaned off. Use a mild detergent mixed with warm water and a soft brush or cloth to gently wipe down the travertine surface.
This step is vital to prepare the stone for sealing. Residual substances can hinder the adhesion and performance of the new sealer, leading to potential issues down the line. Be diligent in your cleaning, rinsing the surface multiple times to ensure that all soap residues are removed.
After cleaning, allow the travertine to dry completely. Proper surface preparation will significantly contribute to the longevity and effectiveness of the new sealer, maintaining the beauty and integrity of your travertine for years to come.
Polishing Travertine for a Radiant Shine
Once the new sealer has cured, consider polishing the travertine to restore its shine and smoothness. Polishing can accentuate the stone’s natural beauty, making it appear vibrant and fresh. Use a polishing compound specifically designed for natural stone, and apply it according to the manufacturer’s instructions.
This step not only enhances the appearance of the travertine but also adds an extra layer of protection against stains and damage. Regular polishing can help maintain the stone’s lustre, making it easier to clean and keep looking its best.
Incorporating polishing into your maintenance routine can significantly elevate the overall aesthetic appeal of your travertine surfaces, ensuring they remain a stunning feature in your home for many years to come.
Common Questions About Travertine and Its Sealers
What type of sealer is ideal for travertine surfaces?
The optimal type of sealer for travertine is typically a penetrating sealer, which provides effective protection while allowing the stone to breathe. This feature is particularly important for outdoor applications where moisture is a concern.
How frequently should I strip and reseal my travertine?
Generally, it is advisable to strip and reseal travertine every 1-3 years, depending on foot traffic and environmental conditions. Regular maintenance can significantly extend the surface’s lifespan and appearance.
Is it safe to use vinegar for cleaning travertine surfaces?
No, vinegar is acidic and can damage travertine. Instead, opt for a pH-neutral cleaner specifically designed for natural stone to avoid etching and other damage.
How can I tell if my travertine sealer needs reapplication?
If water no longer beads on the surface or if stains penetrate quickly, it may be time to strip and reapply the sealer to maintain adequate protection.
Is using a power washer advisable on travertine surfaces?
Generally, using a power washer on travertine is not recommended. The high-pressure water can damage the porous surface, leading to etching or cracking.
What is the proper technique for applying sealer remover?
Utilise a brush or roller to apply sealer remover for an even coat, following the manufacturer’s instructions regarding dwell time and application methods for optimal results.
Can I use a scrub brush on travertine surfaces?
Yes, a soft scrub brush can be used to remove old sealer. However, avoid using abrasive brushes that may scratch the surface, compromising its integrity.
How long does travertine typically take to dry after sealer removal?
The drying time for travertine following sealer removal can vary, but it generally takes at least 24 hours for the surface to dry completely and be ready for further treatment.
What should I do if I accidentally damage my travertine?
If you damage your travertine, it is advisable to consult a professional stone restoration specialist who can assess the damage and recommend suitable repair solutions tailored to your needs.
What is the safest method for stripping old sealers from travertine?
The safest approach to removing old sealers from travertine involves using compatible, eco-friendly sealer removers, wearing protective gear, ensuring adequate ventilation, and closely following the manufacturer’s guidelines throughout the application process.
The Article What is the Safest Way to Strip Old Sealers Off Travertine first found on https://www.abbeyfloorcare.co.uk
The Article Safest Methods for Stripping Old Sealers from Travertine appeared first on https://fabritec.org
The Article Safest Methods to Remove Old Sealers from Travertine Was Found On https://limitsofstrategy.com
References:
https://limitsofstrategy.com/safest-methods-to-remove-old-sealers-from-travertine-2/